Digital art has revolutionized the world of creativity, providing artists with powerful tools to express their imagination. One captivating genre within digital art is digital portraiture, where artists bring characters to life with intricate details and vivid expressions. In this step-by-step guide, we’ll explore how to draw a digital portrait like a pro, whether you’re a beginner seeking to hone your skills or an experienced artist looking to elevate your craft.
1. Gather Your Tools

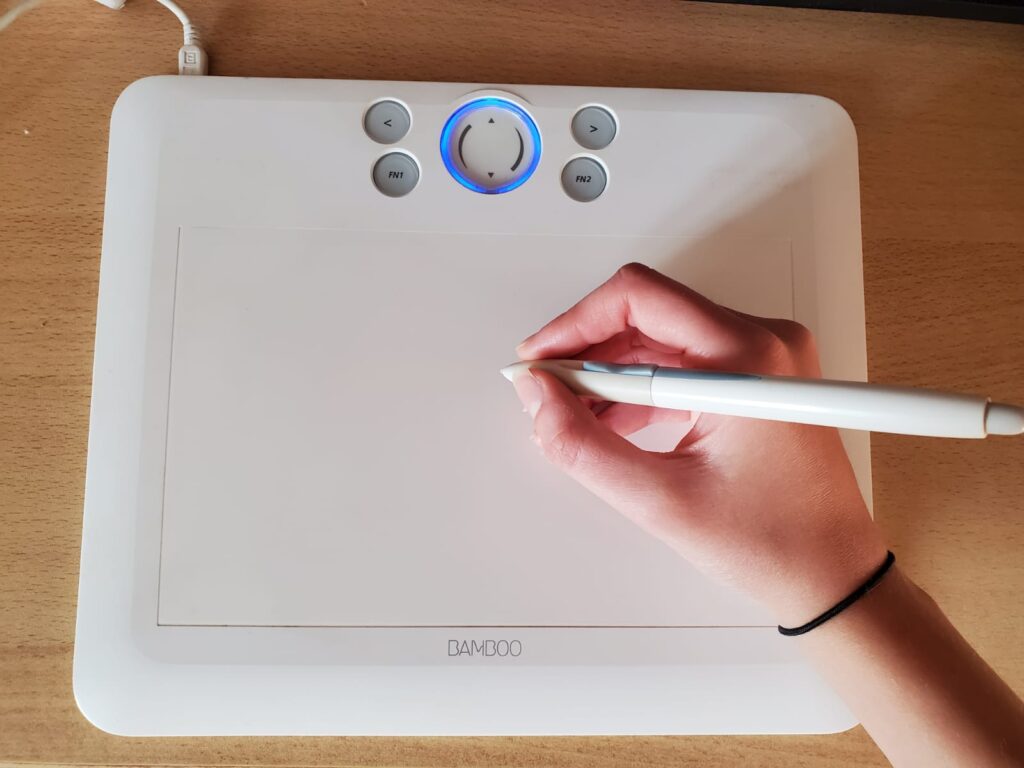
Before diving into the artistic process, ensure you have the right tools. Invest in a quality graphics tablet and stylus for precision, and choose a software that suits your preferences, such as Adobe Photoshop, Clip Studio Paint, or Procreate.
The first step in creating a stunning digital portrait like a pro is to gather the right tools. The tools you use can significantly impact the quality and efficiency of your work. Here’s a detailed breakdown of what you need:
Graphics Tablet
Invest in a high-quality graphics tablet and stylus. This is a crucial tool that provides the sensitivity and precision needed for detailed digital artwork. Popular brands include Wacom, Huion, and XP-Pen. Choose a tablet size that suits your preferences and workspace.
Digital Art Software:
Selecting the right software is key to a smooth digital art experience. There are several options available, each with its strengths:
- Adobe Photoshop: A versatile and widely-used software with a range of features suitable for digital art;
- Clip Studio Paint: Known for its powerful brush engine and specialized tools for comic and manga art;
- Procreate: A user-friendly app with a strong focus on natural media simulation, popular among iPad users.
Choose the software that aligns with your workflow and artistic goals.
Computer or Tablet
Ensure that your computer or tablet meets the system requirements of your chosen software. A powerful device will handle larger file sizes and complex artwork more efficiently. Some artists prefer using tablets with built-in screens for a more direct drawing experience.
Reference Materials
Collect reference materials to inspire and guide your portrait. Gather images of faces, expressions, and lighting situations that resonate with you. Having a diverse range of references will enrich your artistic vocabulary and help you create more dynamic and realistic portraits.
Comfortable Workspace
Set up a comfortable and ergonomic workspace. Adjust your chair, table, and monitor to reduce strain during long drawing sessions. Good lighting is essential to see details clearly and avoid eye fatigue.
Backup Solutions
Don’t forget to implement a reliable backup solution for your artwork. Whether it’s cloud storage, an external hard drive, or both, regularly backing up your files ensures you won’t lose your precious work in case of technical issues.
Online Resources
Explore online resources such as tutorials, forums, and communities. Websites like YouTube, ArtStation, and DeviantArt offer a wealth of tutorials and discussions that can help you learn new techniques and stay updated on industry trends.
By gathering these essential tools, you’re setting the foundation for a seamless and enjoyable digital portrait drawing experience. Once you have everything in place, you’ll be ready to move on to the next steps of the creative process.
2. Reference Gathering

Great portraits often begin with strong references. Collect a variety of images that inspire you and study facial features, expressions, and lighting. These references will serve as valuable guides during the creation process.
The second crucial step in drawing a digital portrait like a pro is reference gathering. References serve as your guide, providing inspiration and insights into the intricate details that make a portrait come to life. Here’s a detailed guide on how to effectively gather and utilize references:
- Diverse Reference Collection. Build a diverse collection of references that cover a wide range of facial features, expressions, and lighting scenarios. Include references for different age groups, ethnicities, and genders. This diverse pool will enrich your understanding of human anatomy and help you create more authentic and inclusive portraits;
- Study Facial Anatomy. Take the time to study facial anatomy through your reference materials. Understanding the structure of the face, including the placement of features like eyes, nose, mouth, and ears, is fundamental to creating realistic portraits. Use anatomy books, online resources, and 3D models to deepen your knowledge;
- Capture Expressions. Expressions are a vital aspect of portraiture. Collect references that showcase a variety of emotions, from joy and laughter to contemplation and sadness. Observing how facial muscles move during different expressions will enhance your ability to convey emotions in your digital portraits;
- Lighting Exploration. Experiment with references that present various lighting situations. Pay attention to how light interacts with different facial planes, casting shadows and creating highlights. Understanding lighting is crucial for adding depth and dimension to your portraits. Study both natural and artificial lighting scenarios for versatility;
- Pose Inspiration. Explore different poses to add dynamism and personality to your portraits. References with interesting and dynamic poses can elevate your artwork. Consider using pose reference apps or websites that provide a wide range of model poses for artists. This will help you avoid stiffness and repetition in your compositions;
- Create a Reference Library. Organize your references in a systematic manner. Create folders or boards based on categories such as expressions, poses, and lighting. Having a well-organized reference library will save you time and make it easier to find the right inspiration when you need it;
- Analyze and Internalize. Don’t just passively collect references; analyze and internalize the details. Study how light falls on the face, observe the subtleties in expressions, and take note of unique features that make each face distinctive. This active engagement with your references will inform your artistic decisions during the drawing process;
- Combine Multiple References. Feel free to mix and match elements from different references to create a unique and personalized portrait. Combining features, expressions, and poses allows you to exercise creative freedom while still grounding your artwork in the realism derived from references.
By investing time in reference gathering, you’re equipping yourself with a visual arsenal that will fuel your artistic journey. The insights gained from studying diverse references will enhance your ability to create authentic, visually compelling digital portraits. With a well-curated collection, you’re ready to move on to the next stages of sketching and refining your digital portrait.
3. Sketching the Foundation

Start by sketching the basic shapes and proportions of your subject. Focus on capturing the overall composition and pose. Don’t get caught up in details at this stage; it’s about establishing the foundation for your digital portrait.
With your references in hand, it’s time to move on to the next crucial step: sketching the foundation of your digital portrait. This initial sketch lays the groundwork for the entire artwork, establishing proportions, composition, and the overall feel of the portrait. Here’s a detailed guide on how to approach this stage like a pro:
- Create a New Canvas/ Open your digital art software and create a new canvas. Choose dimensions that suit your preferences, considering factors like the level of detail you want and the final presentation size;
- Set Up Your Sketching Tools. Select a basic brush or pencil tool for sketching. Keep the opacity relatively low to allow for easy adjustments and modifications as you refine the sketch. Many artists prefer starting with a neutral color for the initial sketch, such as a light gray;
- Establish Basic Shapes. Begin by sketching the basic shapes to outline the head and facial features. Focus on the overall proportions, keeping in mind the reference materials you’ve gathered. Use light, gestural strokes to map out the placement of the eyes, nose, mouth, and ears;
- Consider Facial Symmetry. Pay attention to facial symmetry to ensure a balanced and realistic look. Use guidelines to mark the center of the face and align facial features accordingly. This step is crucial in the early stages to avoid disproportionate features later on;
- Refine the Face Structure. Gradually refine the structure of the face, working on the details of each facial feature. Pay close attention to the distance between features, the angle of the jawline, and the shape of the forehead. This stage is about capturing the essence of your subject;
- Block in Hair and Neck. Extend your sketch to include the hair and neck. Consider the hairstyle and its interaction with the overall composition. Block in the general shape of the hair and the position of the neck, maintaining a loose and gestural approach at this point;
- Adjust Proportions as Needed. Step back and assess your sketch. If you notice any proportions that seem off, don’t hesitate to make adjustments. This is the stage where you have the flexibility to refine and correct before diving into more detailed work;
- Experiment with Composition. Explore different compositions for your portrait. Experiment with head angles, poses, and overall framing. This stage is an opportunity to inject personality into your portrait and make creative decisions about how you want to present your subject;
- Add Basic Facial Details. As you refine the sketch, start adding basic details to the facial features. Outline the eyes, nose, and mouth with more defined lines. Pay attention to the unique characteristics of your subject, and ensure that your sketch captures their individuality;
- Multiple Sketch Layers. Consider working with multiple sketch layers. This allows you to iterate without affecting the underlying sketch. For instance, you can create a new layer for facial features, another for hair, and so on. This layering approach provides flexibility throughout the creative process;
- Save Iterations. Save different iterations of your sketch as you progress. This enables you to backtrack if needed and compare different versions to see how your portrait evolves. It’s a good practice to save your work regularly to prevent any potential loss of progress.
Remember, the foundation sketch is the blueprint for your digital portrait. Take your time at this stage, ensuring that you are satisfied with the overall composition and proportions before moving on to the next steps of refining details and adding depth through shading and lighting.
In conclusion
Drawing a digital portrait like a pro involves a combination of technical skill, artistic intuition, and a passion for continuous improvement. By following these step-by-step guidelines, you’ll be well on your way to creating digital portraits that captivate and showcase your artistic prowess. So, grab your stylus, unleash your creativity, and embark on a journey of digital portraiture mastery!